I built this lab to study Android pentesting and to make my day-to-day work more efficient. A big part of my job is testing mobile apps, including financial apps, and for that I need to intercept their traffic. In this post I document step by step how I set it up and the details you need to get right so nothing is left out. By the end, you’ll have a rooted Pixel 8 on Android 16 sending HTTPS traffic from any app to Burp Suite.
One thing this post doesn’t cover is SSL pinning. Apps that pin their certificates will still reject Burp’s CA even with everything below in place, and bypassing that is a topic of its own.
The setup
| Component | Version |
|---|---|
| Device | Pixel 8 |
| Android | 16 (CP1A.260505.005) |
| Root | Magisk 30.7 |
| Host | Arch Linux (kernel 7.2.14-arch1-1) |
| Proxy | Burp Suite Community 2026.10.1 |
| Tools | platform-tools 37.0.1, OpenSSL 3.6.5 |
Why a physical device instead of an emulator? Sometimes I need to test features that depend on real hardware, like tap to pay (NFC) or biometric authentication.
Verifying root
adb devices -l
adb shell su -c id
Configuring Burp
Since I connect the device over USB with adb reverse, I keep Burp’s default listener on 127.0.0.1:8080 (Settings → Tools → Proxy → Proxy listeners). This way the proxy isn’t exposed to the network, which matters when I’m working on networks I don’t control. If you go with Wi-Fi instead, bind the listener to your machine’s LAN IP rather than all interfaces.

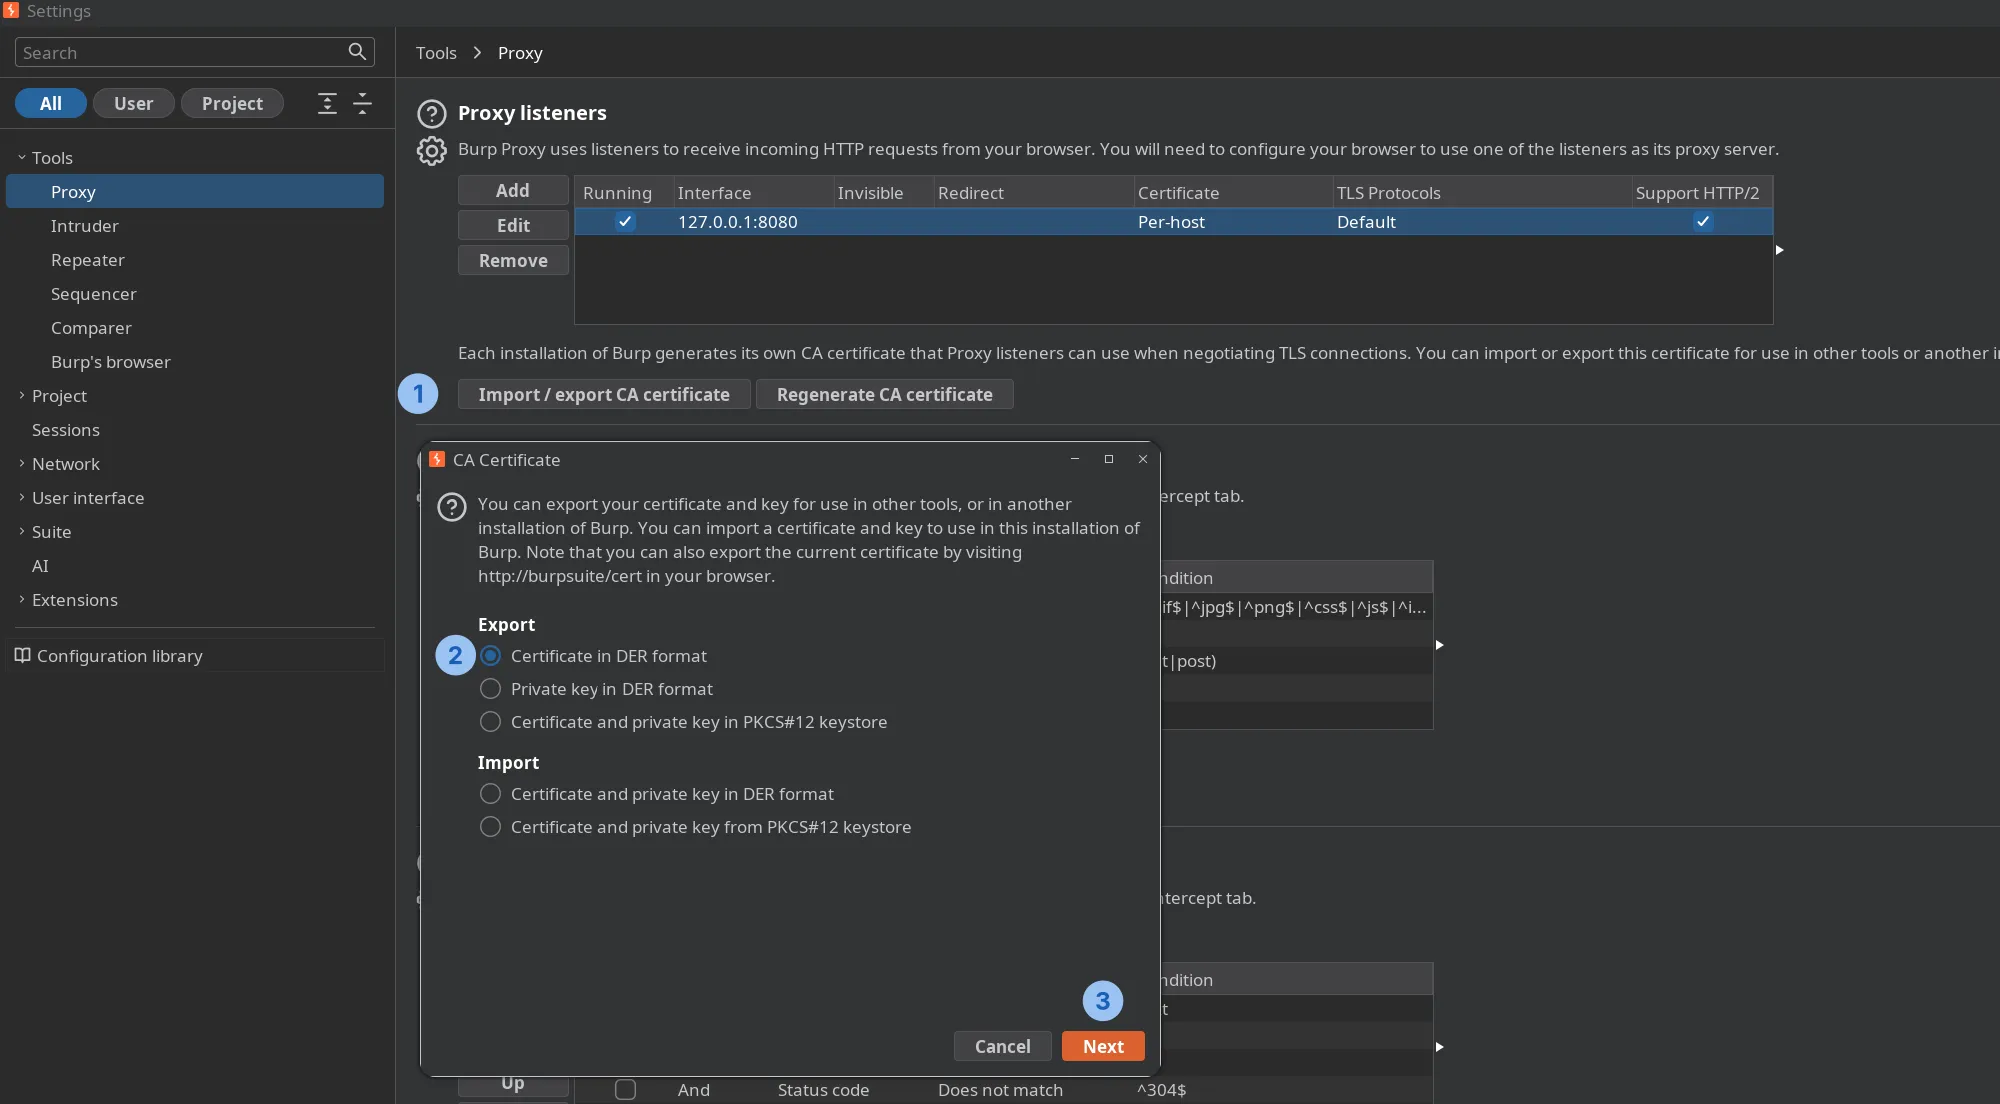
Next, export Burp’s CA. In the same section, click Import / export CA certificate (1), select Certificate in DER format (2) and click Next (3).
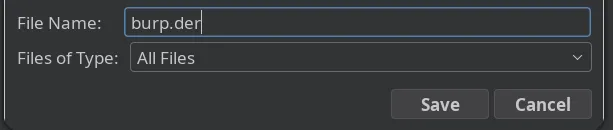
Then choose where to save it. I saved it as burp.der.
Preparing the certificate
Android stores system CAs in PEM format, and each file is named after the certificate’s subject hash: <hash>.0. The .0 is just an index in case two certificates share the same hash.
The important detail is that Android uses the old OpenSSL hash (MD5-based, from before OpenSSL 1.0). If you use -subject_hash, you get a different value and Android won’t pick up the certificate, so you need -subject_hash_old.
openssl x509 -inform DER -in burp.der -out burp.pem
openssl x509 -inform PEM -subject_hash_old -in burp.pem -noout
cp burp.pem <hash>.0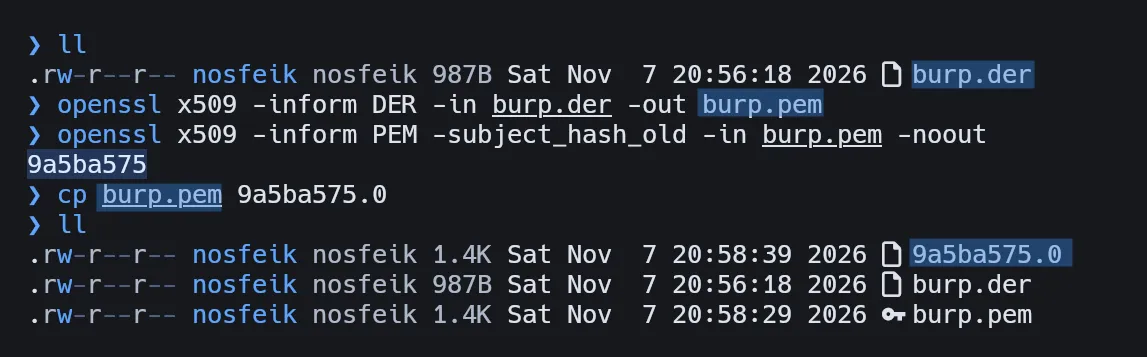
The hash comes from the certificate’s subject, not from its key. Every Burp installation generates a CA with the same subject (PortSwigger CA), so you’ll most likely get 9a5ba575 too, even though the key is different in each installation.
Routing traffic through Burp
Option 1: USB with adb reverse
adb reverse tcp:8080 tcp:8080
adb shell settings put global http_proxy 127.0.0.1:8080
adb reverse makes 127.0.0.1:8080 on the device point to 127.0.0.1:8080 on my machine. With ss you can confirm that Burp is only listening on loopback. The [::ffff:127.0.0.1] address is just the IPv4 loopback mapped into an IPv6 socket, because Java opens dual-stack sockets.

To confirm that both the proxy and the reverse mapping are set on the device:
adb shell settings get global http_proxy
adb reverse --list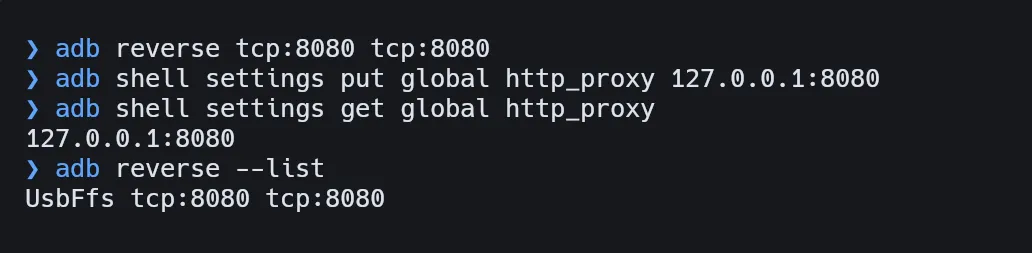
Keep in mind that the adb reverse mapping is lost every time you unplug the device or the adb server restarts. If traffic suddenly stops reaching Burp, this is the first thing to check. The proxy setting stays on the device, so without the mapping the apps lose internet.
Option 2: Wi-Fi
USB is my default, but sometimes I need the device free of cables, for example when testing tap to pay. In that case the device reaches Burp over the local network.
First, add a second listener in Burp bound to the machine’s LAN IP (Settings → Tools → Proxy → Proxy listeners → Add). I use port 8081 so it doesn’t collide with the USB listener, and I bind it to the specific address instead of all interfaces, so Burp is only reachable from the local network.
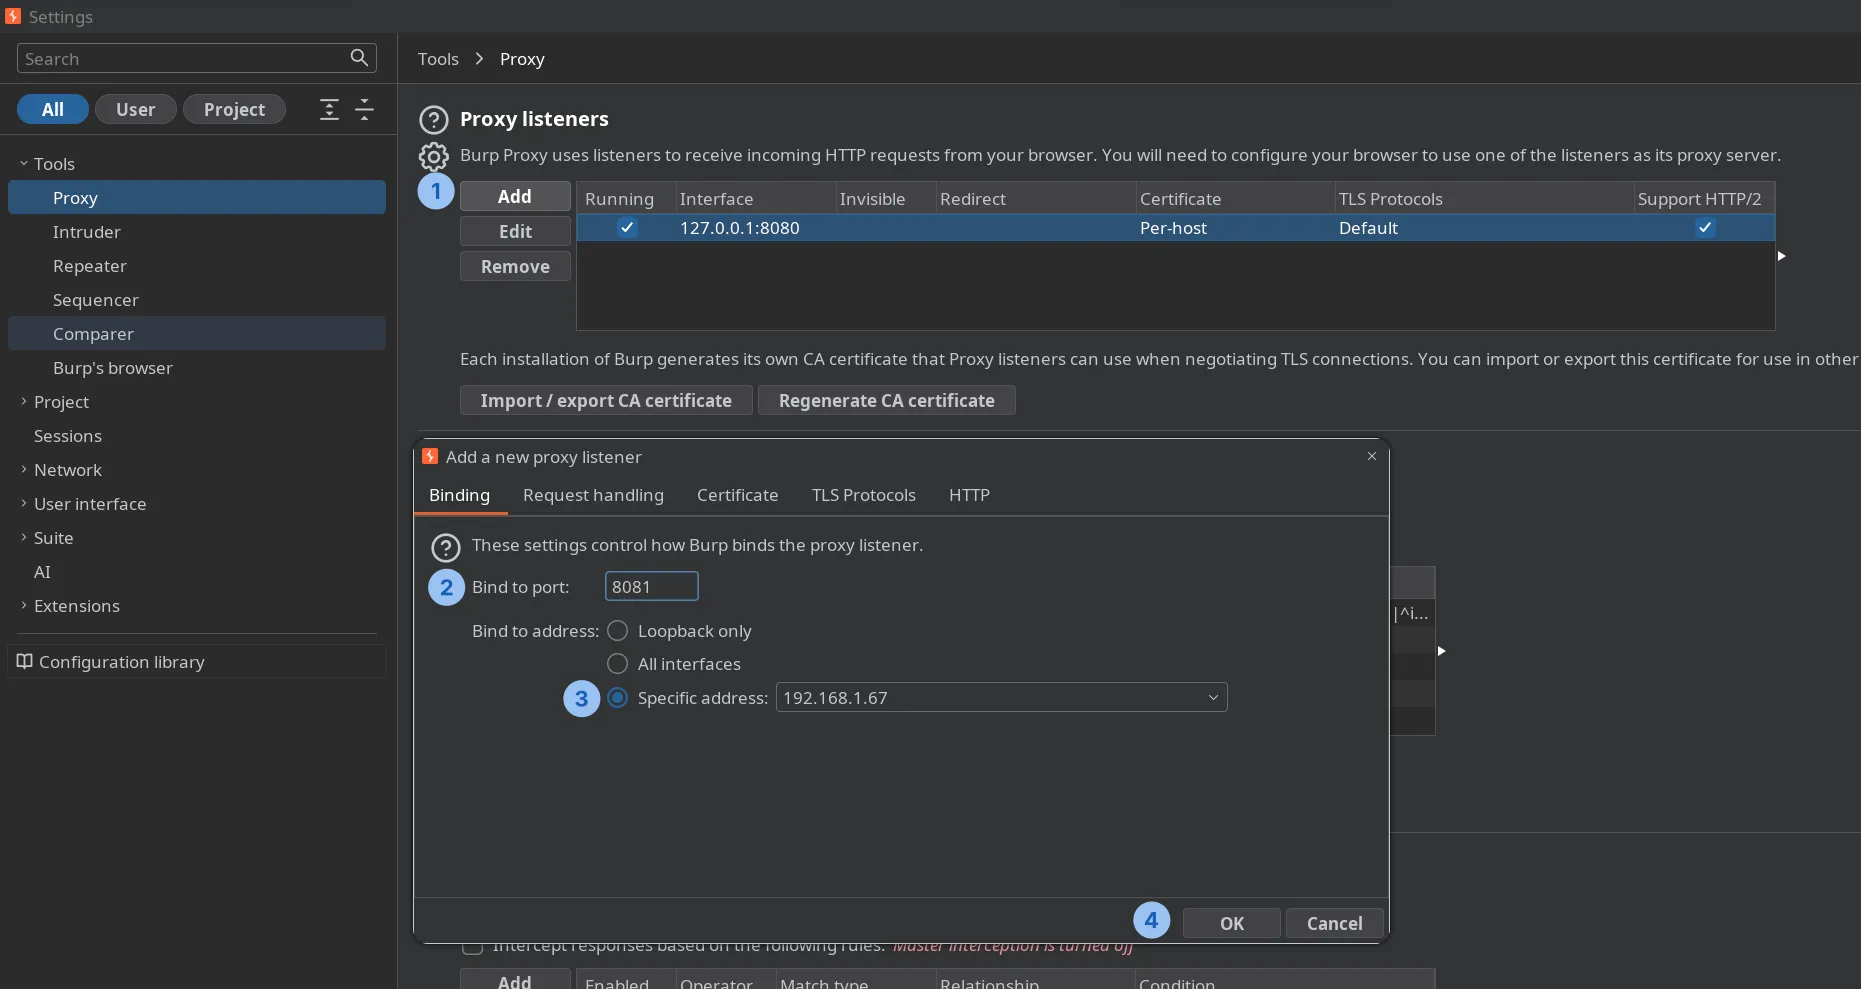
Then remove the adb reverse mapping, get the machine’s IP and point the device’s proxy to it:
adb reverse --remove tcp:8080
ifconfig | grep "192.*"
adb shell settings put global http_proxy 192.168.1.67:8081
Firewall
Unlike the USB option, here the device opens a connection to the machine over the network, so the firewall has to allow it. I have ufw active, so I only allow the port from the device’s IP, which you can get with:
adb shell ip -4 addr show wlan0
sudo ufw allow from <device-ip> to any port 8081 proto tcp
Setting the proxy from the device
Instead of adb, the proxy can also be set per network from the device’s Wi-Fi settings. To take the screenshots and control the device from my machine I use scrcpy (sudo pacman -S scrcpy). The -d flag tells it to use the device connected over USB:
scrcpy -d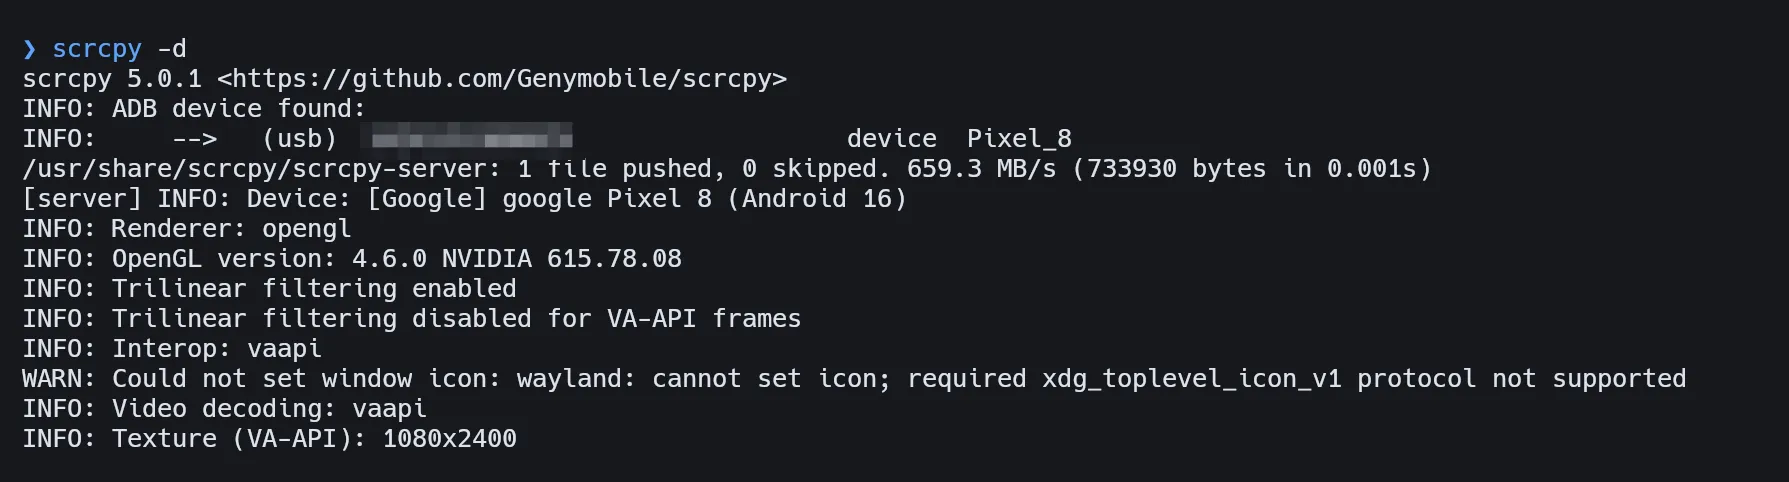
Go to Settings → Network & internet → Internet and tap the gear next to the connected network:
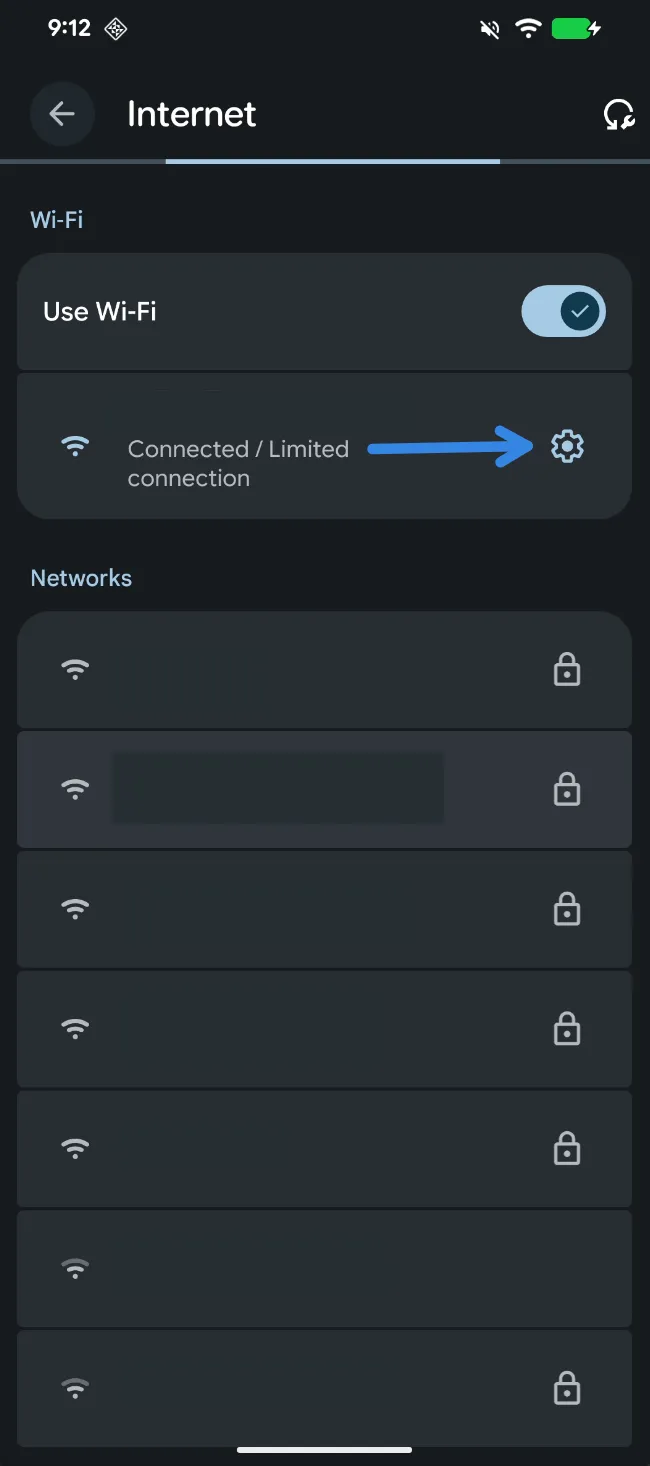
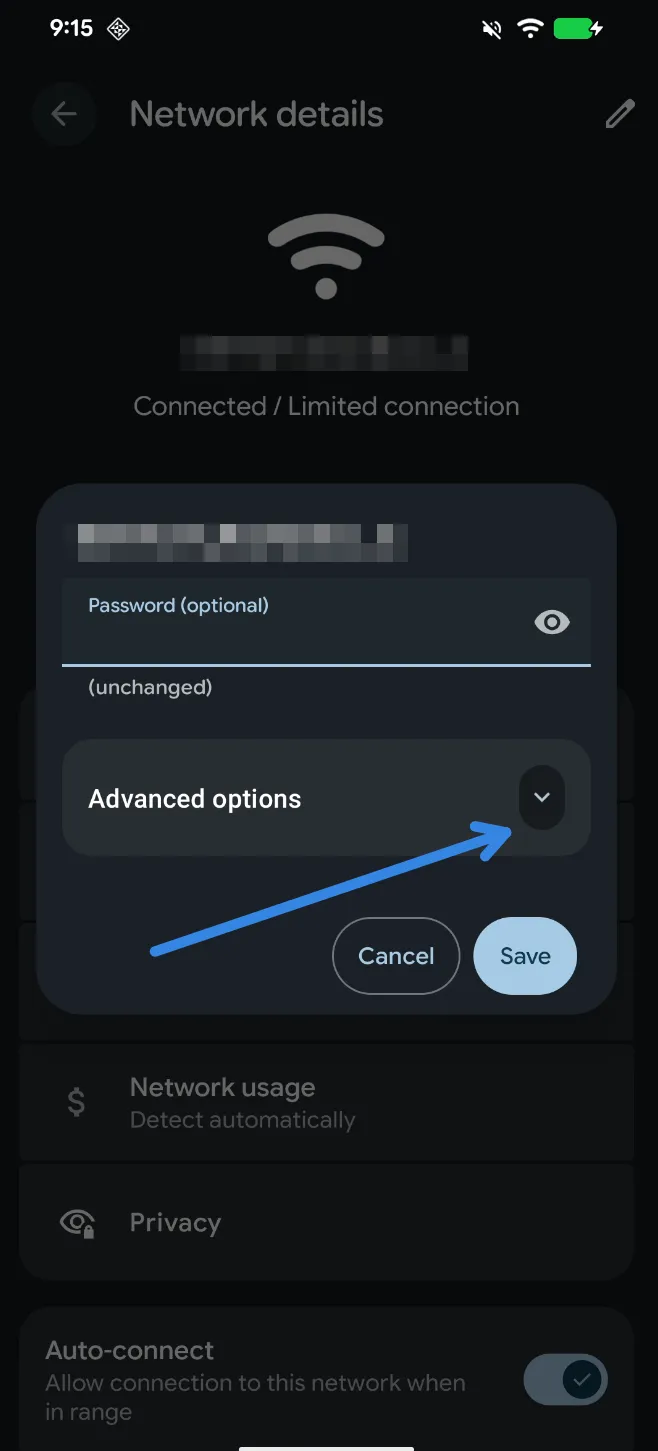
Tap the pencil to edit the network:
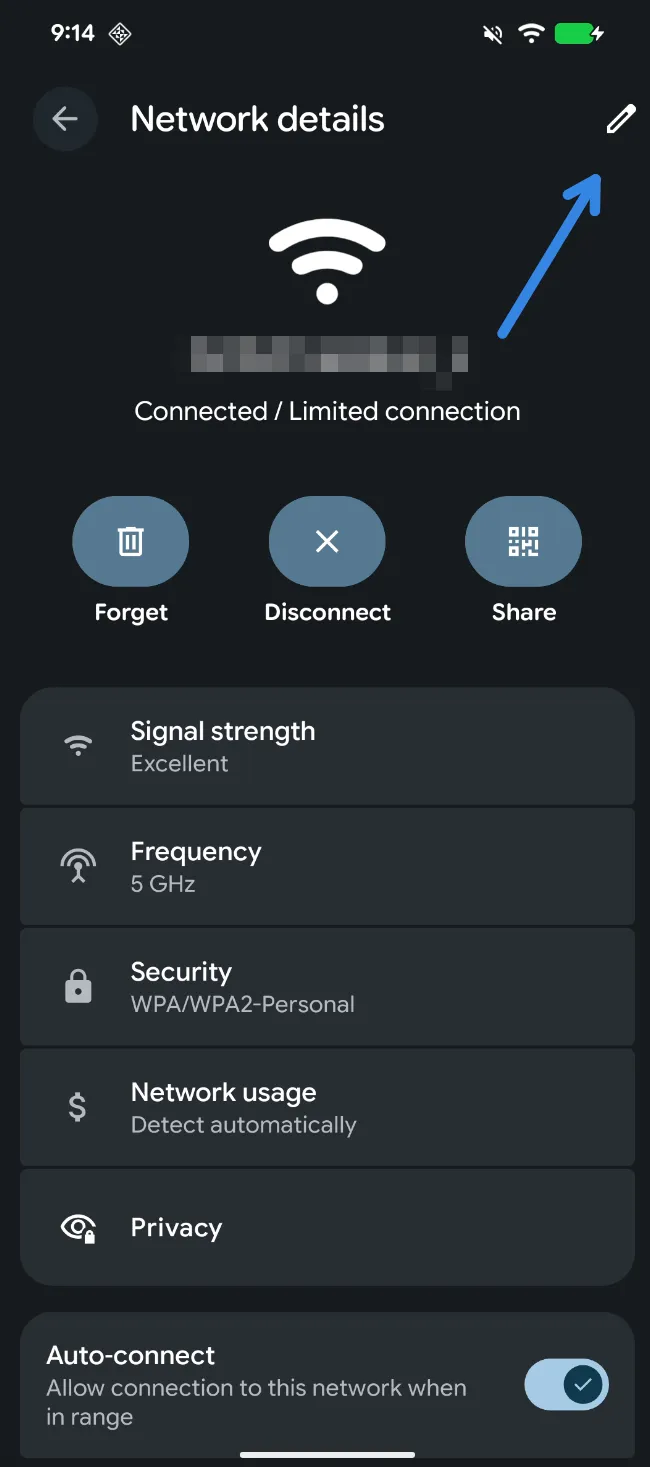
Expand Advanced options:
Set Proxy to Manual, enter the machine’s IP and the listener port, and save:
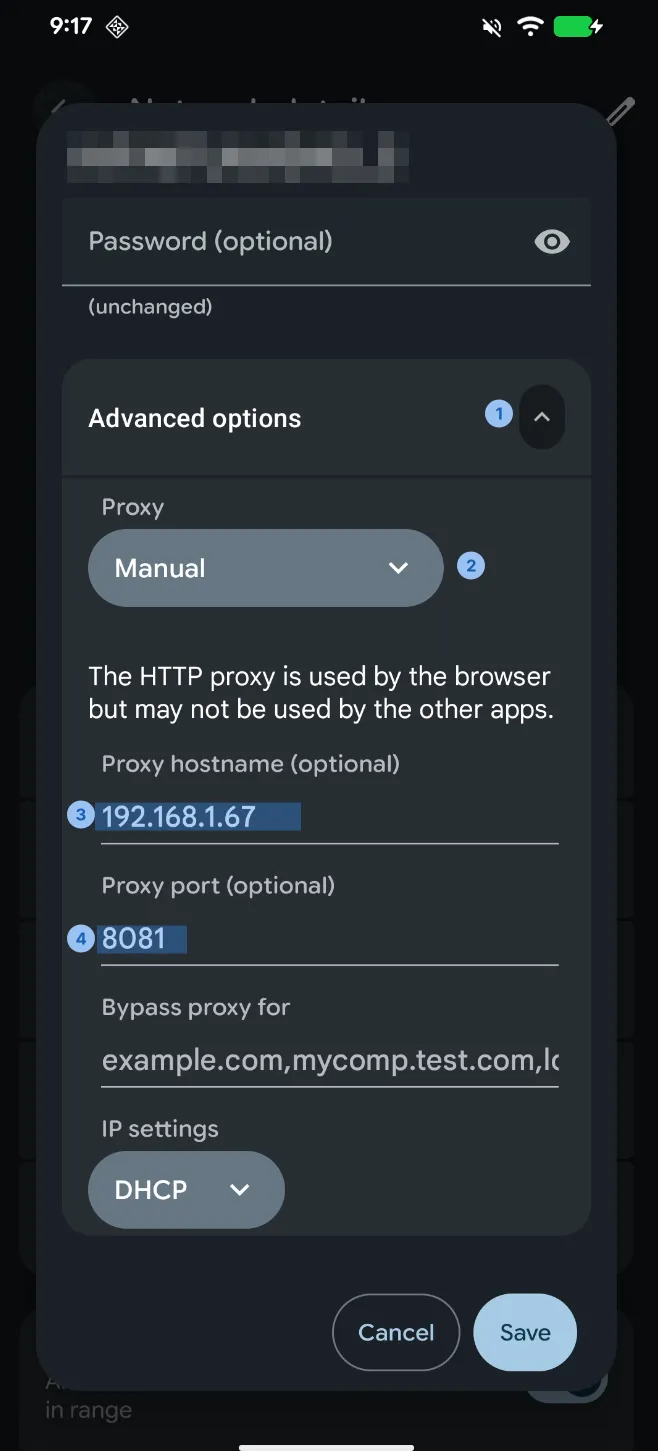
These two methods are not the same:
- The proxy set from the Wi-Fi settings only applies to that network. If the device connects to another network, it’s not used.
- The proxy set with
settings put global http_proxyis global and takes priority over the per-network one. It also doesn’t show up in the Wi-Fi settings, so if you forget it’s there, the device loses internet as soon as Burp isn’t listening and nothing in the UI tells you why.
Use one or the other, not both.
Verifying
Burp should now be listening on the LAN IP:
ss -tlnp | grep 8081
Compared to the USB listener, it’s now bound to 192.168.1.67 instead of loopback.
And opening http://burp in the device’s browser should show Burp’s welcome page:
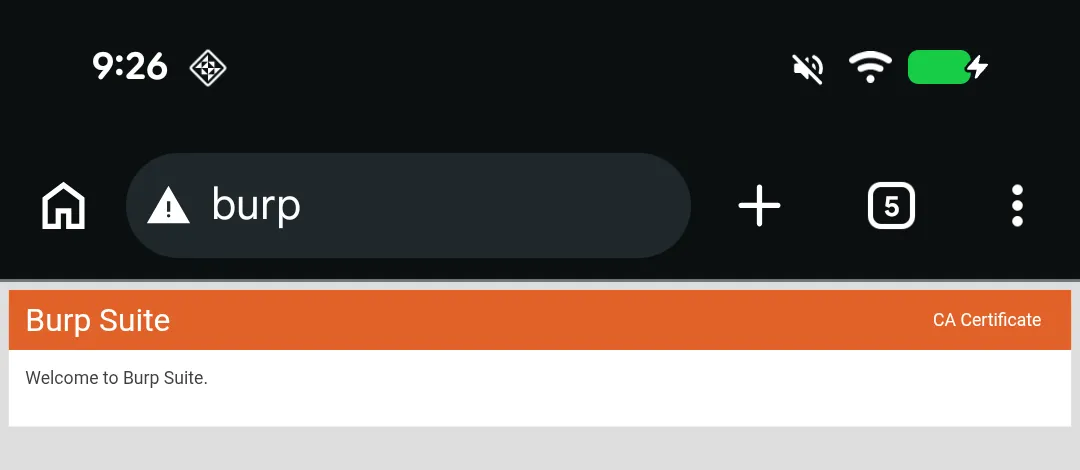
This page is served by Burp itself, so if it loads, the device is reaching the proxy. The warning icon in the address bar is expected, since the page is plain HTTP.
One more thing: guest, corporate or public networks often have client isolation, which blocks devices on the same network from reaching each other. In that case this option won’t work even if everything is configured correctly, which is one more reason I prefer USB.
Removing the proxy
adb shell settings put global http_proxy :0User CAs vs system CAs
At this point traffic reaches Burp, but HTTPS still fails. Android has two trust stores: the system store, which ships with the OS, and the user store, which is where a certificate goes when you install it from Settings.
Since Android 7, apps that target API 24+ only trust the system store by default. To trust user CAs, the app has to opt in through its network_security_config:
<network-security-config>
    <base-config>
        <trust-anchors>
            <certificates src="system" />
            <certificates src="user" />
        </trust-anchors>
    </base-config>
</network-security-config>
Almost no production app ships this, and you can’t change it without repackaging the APK. So for a lab that works with any app, the CA has to be in the system store.
Installing the CA on Android 14+
On Android 9 and older, this was just a matter of remounting /system as read-write and copying the <hash>.0 file to /system/etc/security/cacerts. That doesn’t work anymore.
Since Android 14, the system CAs are loaded from the Conscrypt APEX: /apex/com.android.conscrypt/cacerts. APEX modules are mounted read-only from signed images and can be updated through Google Play, so you can’t just write a file in there. On my Pixel 8 with Android 16 it’s still the same path:
adb shell "su -c 'ls /apex/com.android.conscrypt/cacerts | wc -l'"
120
The workaround is to mount a tmpfs with a copy of the stock CAs plus your own on top of that directory. The catch is mount namespaces: every app runs in its own mount namespace, inherited from Zygote (the process every app is forked from). A mount made from adb shell lives in the global namespace and apps never see it. So the tmpfs has to be bind mounted inside Zygote’s namespace, so new apps inherit it, and inside the namespace of every app that is already running. That’s what nsenter is for.
The manual way
This is the script I run on the device as root. Nothing is written to /system or /apex, everything lives in memory:
#!/system/bin/sh
CERT="$1"
APEX_DIR=/apex/com.android.conscrypt/cacerts
SYS_DIR=/system/etc/security/cacerts
STAGE=/data/local/tmp/cacerts-stage

# 1. Stage the stock CAs plus our CA
rm -rf "$STAGE" && mkdir -p "$STAGE"
cp "$APEX_DIR"/* "$STAGE"/
cp "$CERT" "$STAGE"/

# 2. Mount a writable tmpfs over the system cert dir and fill it
mount -t tmpfs tmpfs "$SYS_DIR"
cp "$STAGE"/* "$SYS_DIR"/
chown root:root "$SYS_DIR"/*
chmod 644 "$SYS_DIR"/*
chcon u:object_r:system_security_cacerts_file:s0 "$SYS_DIR"/*
rm -rf "$STAGE"

# 3. Bind it over the APEX dir inside Zygote and every app already forked from it
for Z in $(pidof zygote zygote64); do
  PIDS="$Z $(ps -A -o PID,PPID | awk -v z="$Z" 'NR>1 && $2==z {print $1}')"
  for P in $PIDS; do
    nsenter --mount=/proc/"$P"/ns/mnt -- mount --rbind "$SYS_DIR" "$APEX_DIR"
  done
  echo "zygote $Z: injected into $(echo $PIDS | wc -w) processes"
done

echo "CA store now has $(ls "$SYS_DIR" | wc -l) certs"
Save it as inject-ca.sh, push it to the device together with the <hash>.0 file from before, and run it as root:
adb push 9a5ba575.0 inject-ca.sh /data/local/tmp/
adb shell "su -c 'sh /data/local/tmp/inject-ca.sh /data/local/tmp/9a5ba575.0'"
Output on my device:
zygote 948: injected into 132 processes
CA store now has 121 certs
120 stock CAs plus Burp’s. The Pixel 8 only runs 64-bit apps, so there’s only a zygote64.
To see the namespace thing in practice, compare the same directory from adb shell and from inside an app’s namespace (Chrome here):
# global namespace
adb shell "su -c 'ls /apex/com.android.conscrypt/cacerts | grep 9a5ba575'"
# (nothing)

# app namespace
adb shell "su -c 'nsenter --mount=/proc/\$(pidof com.android.chrome)/ns/mnt -- ls /apex/com.android.conscrypt/cacerts | grep 9a5ba575'"
9a5ba575.0
The Magisk module way
I also have AlwaysTrustUserCerts by NVISO (v1.3) installed. It takes every CA from the user store and applies the same technique at boot: post-fs-data.sh collects the certs and service.sh mounts the tmpfs and runs nsenter + mount --rbind on Zygote and its children. It also keeps a loop running that re-injects if Zygote restarts.
The workflow is simpler: install the CA as a user certificate and reboot. Push the DER file with a .crt extension so the certificate installer recognizes it:
adb push burp.der /sdcard/Download/burp.crtThen go to Settings → Security & privacy → More security & privacy → Encryption & credentials → Install a certificate → CA certificate, accept the warning and pick burp.crt. After a reboot, the module copies it to the system store.
The downside is that it only collects the certs at boot, so every change needs a reboot.
Reading service.sh I noticed the check before re-injecting into Zygote is has_mount "$pid" instead of has_mount "$zp", so it checks the wrong process. On my device Zygote ended up with the same tmpfs mounted 6 times on top of itself:
adb shell "su -c 'grep -c conscrypt/cacerts /proc/\$(pidof zygote64)/mountinfo'"
6
It doesn’t break anything, but it’s a good example of why it’s worth reading what a module does before trusting it.
Persistence across reboots
Everything above lives in a tmpfs, so a reboot wipes it. With the manual way you run the script again after each boot. With the module it’s applied automatically, but only with the CAs that are in the user store at that moment.
This bit me: the user store had three PortSwigger CA certificates (9a5ba575.0, .1 and .2) from older Burp installations, and none of them matched my current Burp CA. Same subject, so same hash, different keys. That’s exactly why the .0 index exists. You can compare fingerprints with:
openssl x509 -in burp.pem -noout -fingerprint -sha256So I removed the three old ones and installed the current CA in the user store. User CAs live in /data/misc/user/0/cacerts-added/ in DER format, owned by system, and the hash name works the same way (9a5ba575.0). Now the module picks up the right CA on every boot.
If you regenerate the CA or switch Burp installations, do two things: replace the user certificate (otherwise the module brings back the old one on the next boot, and Chrome keeps failing), and run the manual way so I don’t have to reboot right away.
Verifying interception
The CA shows up under Settings → Security & privacy → More security & privacy → Encryption & credentials → Trusted credentials → System:
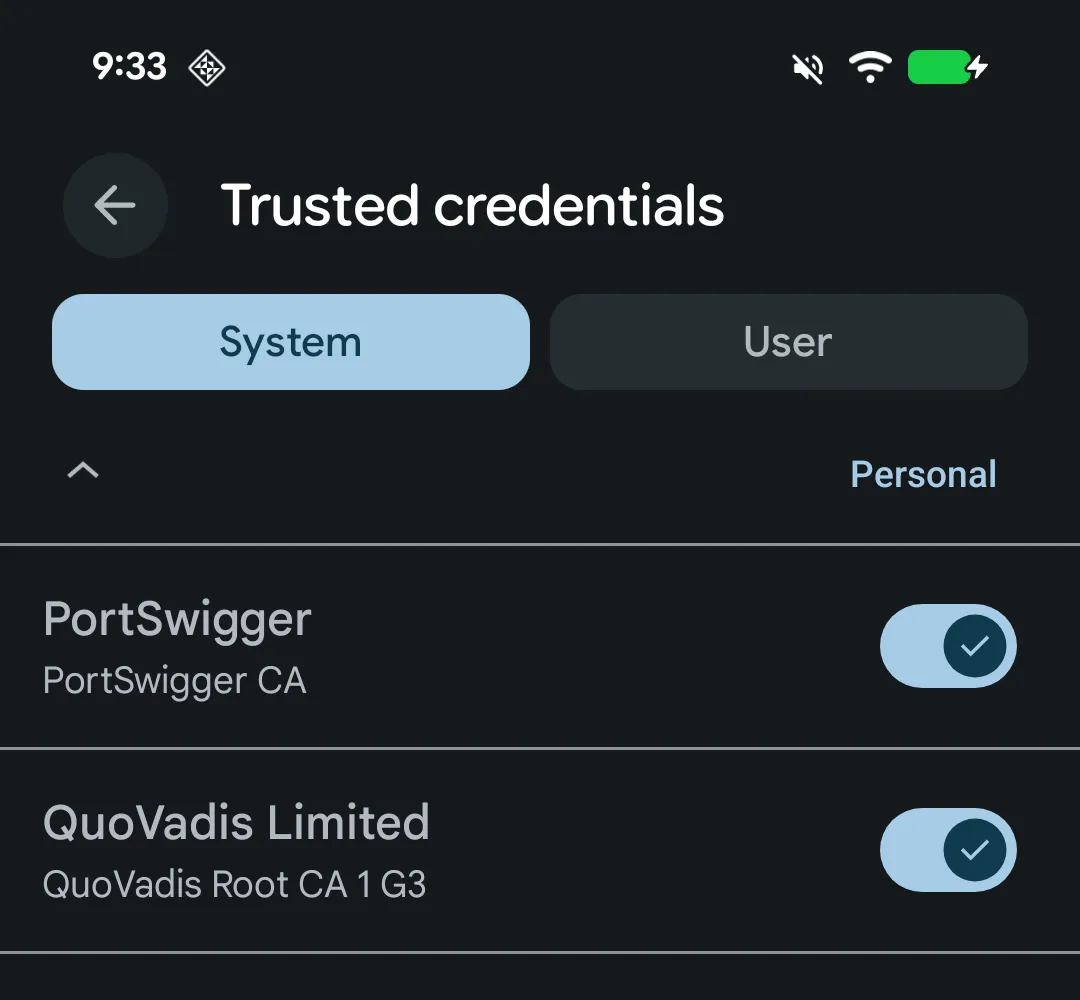
And HTTPS traffic from the device shows up decrypted in Burp’s HTTP history (check the TLS column). Here you can see my test requests to https://example.com from the Pixel, along with the Google services the device talks to in the background:

To test the system trust store without depending on any app, I wrote a minimal Java client that uses HttpsURLConnection (Conscrypt) and ran it with app_process, once from the global namespace and once inside an app’s namespace:
== global namespace
FAIL javax.net.ssl.SSLHandshakeException: java.security.cert.CertPathValidatorException: Trust anchor for certification path not found.
== app namespace
OK  HTTP 200 | issuer: CN=PortSwigger CA,OU=PortSwigger CA,O=PortSwigger,L=PortSwigger,ST=PortSwigger,C=PortSwigger
Chrome is different
Chrome doesn’t use Android’s system trust store. It ships its own (Chrome Root Store), so even with Burp’s CA in the system store and inside Chrome’s namespace, it still fails:
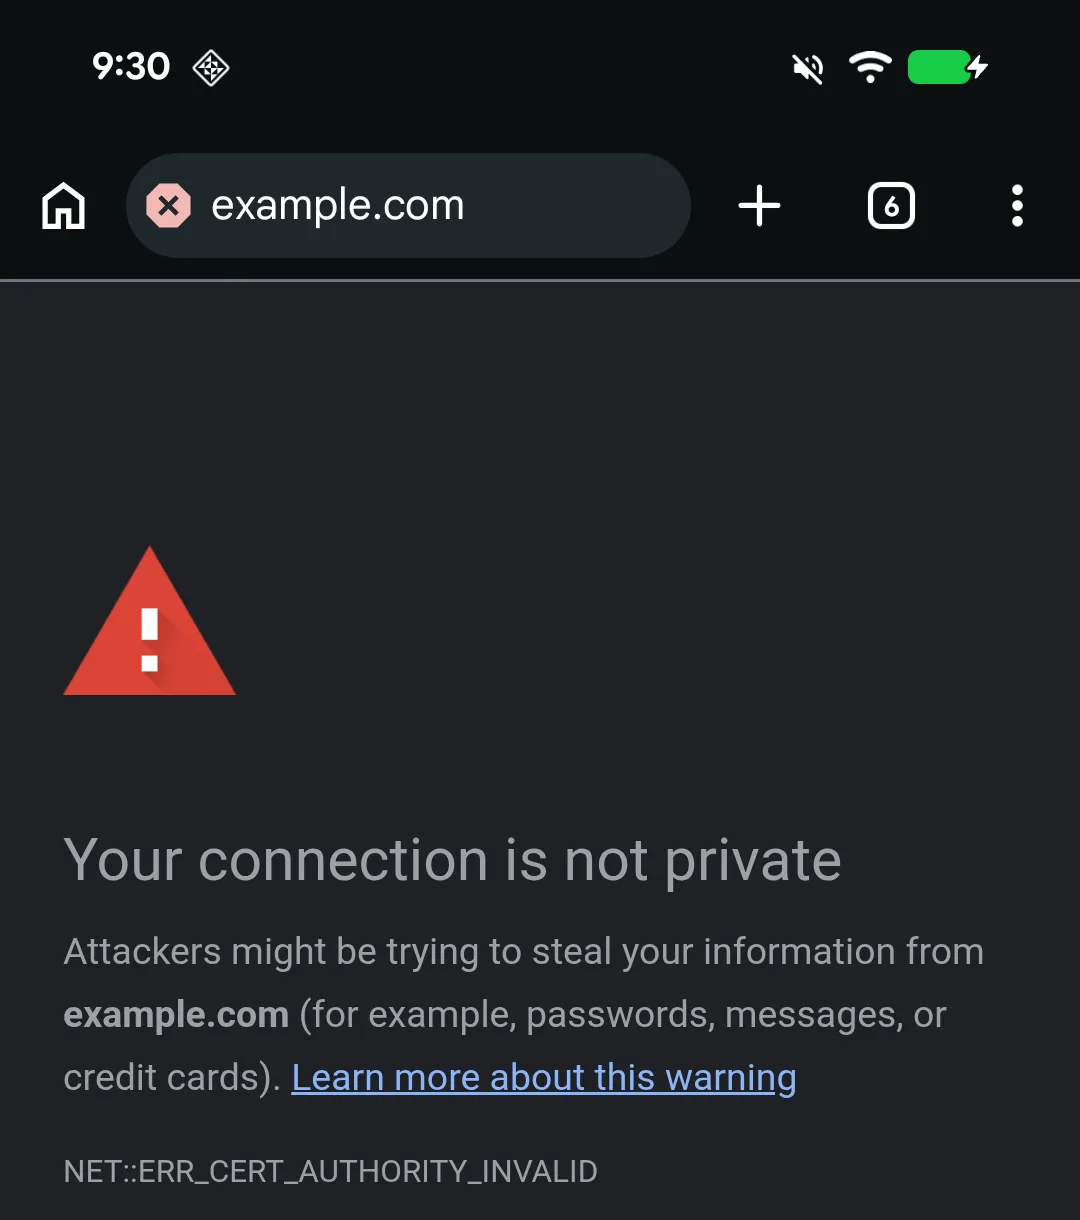
What Chrome does trust is the user store. Once the current CA was installed as a user certificate (and Chrome restarted), the same page loaded through Burp without errors:
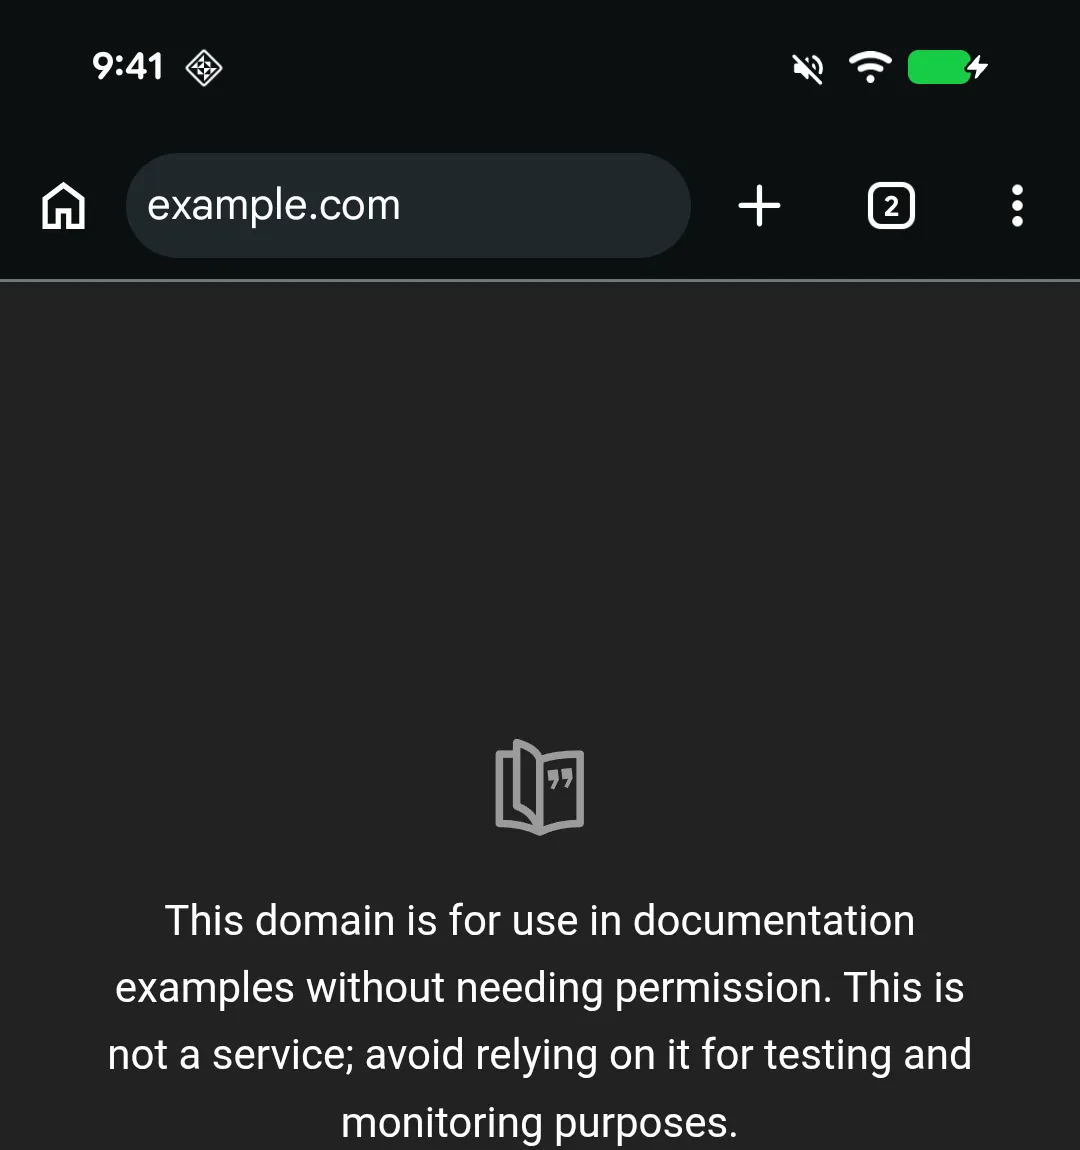
So it’s the opposite of regular apps: apps need the CA in the system store, Chrome needs it in the user store. With the module both are covered, because the CA lives in the user store and the module copies it to the system store on boot. Just don’t use Chrome alone to validate the system store setup.
Troubleshooting
- No internet on the device: the proxy points to something that isn’t listening. Either the
adb reversemapping is gone (unplugged device, adb server restarted) or the Burp listener doesn’t exist. I hit this when the device was pointing to192.168.1.67:8081before the listener was created, and Android only showed “Limited connection”. - Wi-Fi option doesn’t connect: firewall (
ufw) or client isolation on the network. CertPathValidatorException/NET::ERR_CERT_AUTHORITY_INVALIDafter a reboot: the tmpfs is gone, or the CA in the store isn’t the one Burp is currently using. Compare fingerprints.